
Eight Rainy-Day Activities For Toddlers
This is way outside my comfort zone, guys! I usually am not that good at home activities, but the rainy season is coming, so I had to get creative to keep this kid busy! I figured every mom is looking for ways to keep kids occupied, so I'm sharing what we came up with so far. A lot of these ideas mention products, but this post is not sponsored by those companies. They are products I already had or got locally. I will provide links to all of their product pages or mention where you can buy them. If you have questions just comment below or email me. I hope this is helpful!


1. Mask Painting and Playtime
The materials I used for this were wood character masks found at Michaels and washable kids paint. I picked Mickey because my son loves him, but they also have generic things like robot and princess masks. I used the clips on our easel to hold the masks in place (you can also just put them on a table). I let Atlas paint one while I painted the other. He had a blast mixing all his colors and painting both masks. Once he had lost interest, I pulled the masks off and laid them flat to dry on my kitchen counter. Later I pulled them back out for a game of masquerade/peekaboo.


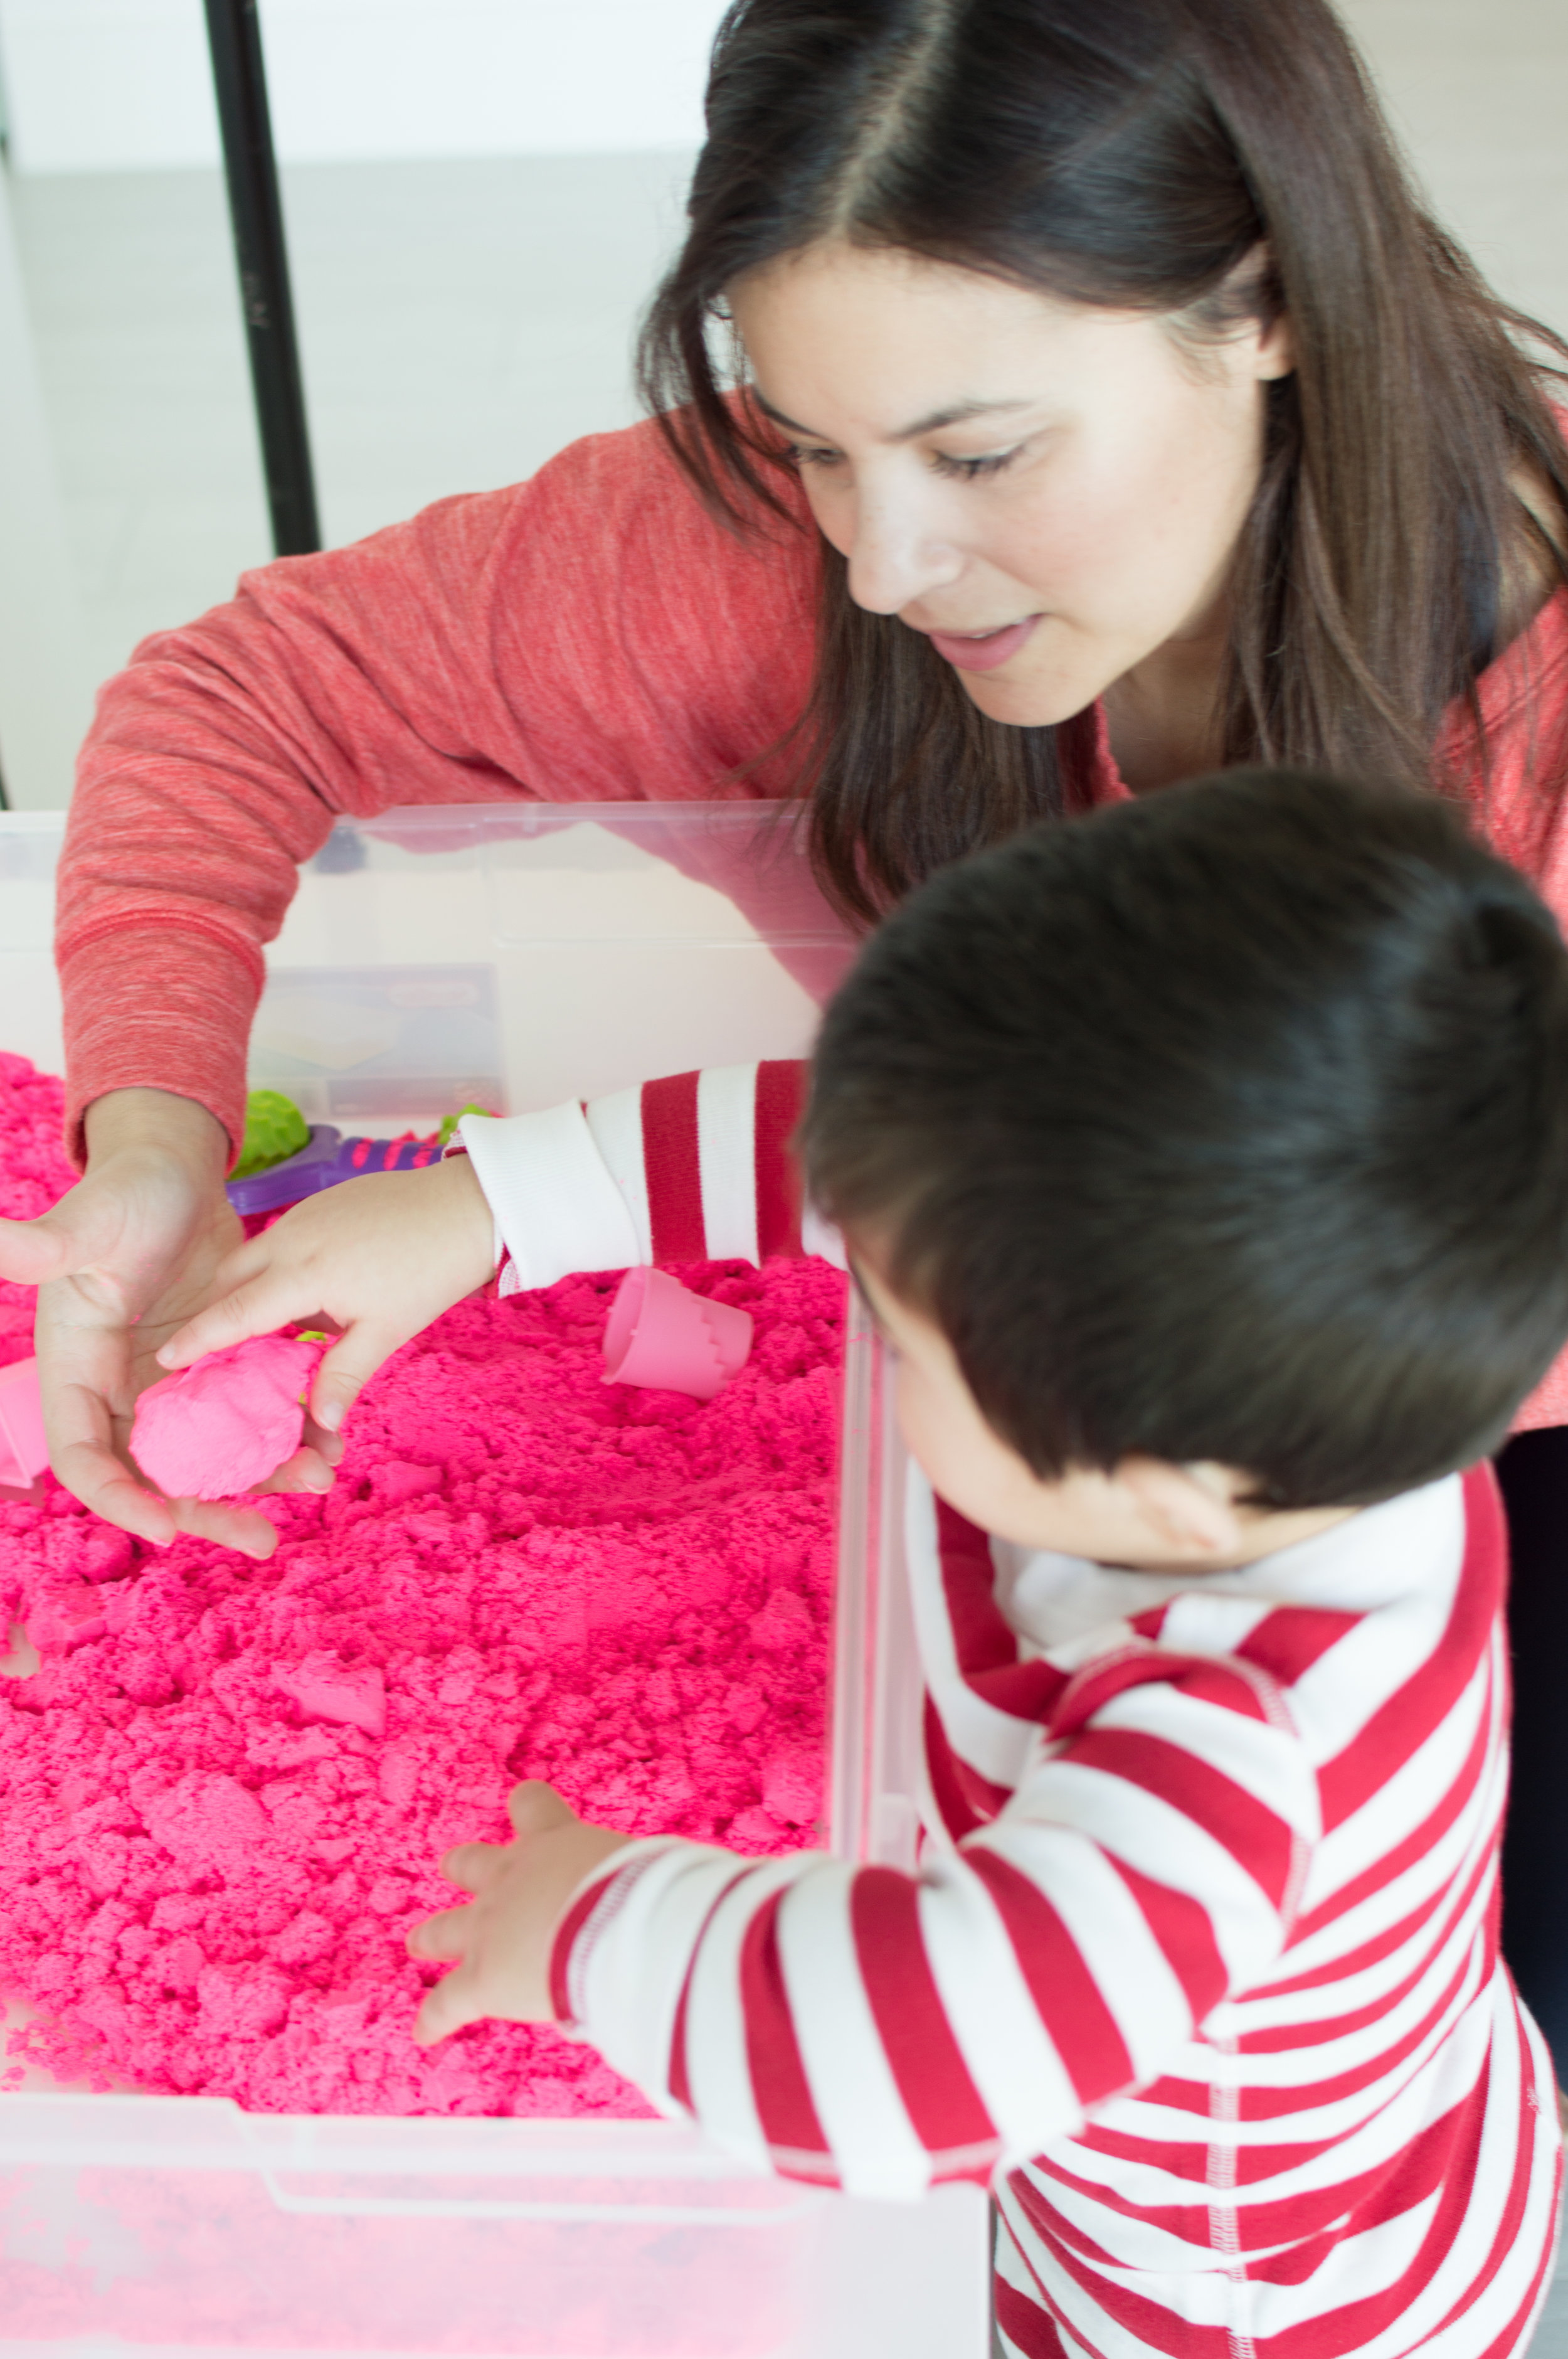

2. Kinetic Sand Sensory Bin
A sensory bin is basically a storage bin filled with something that makes for a good tactile experience for a kid and contains the mess. There are tons of benefits to doing these sensory games; if you want to read more about them, check out this article. The sensory bin that we like the most is one filled with kinetic sand. It keeps Atlas busy for about an hour! Kinetic sand is sand that has something in it that makes it stick together. It is super fun to play with.
To make this bin, I got a clear storage bin at Target. I recommend one with a lid. Then I ordered a box of kinetic sand from Amazon. I used two-thirds of the box of sand and a few little toys that came in the box. You can also add a scoop or little cars or any toys to the bin. The trick is to place it somewhere easy to reach so kids can freely move the sand around. You can put a sheet down in the area or keep a dustpan nearby. It's best to encourage kids not to throw what's in the bin but to keep it inside. I found that if I was there actively playing with Atlas, he didn't throw anything, but if I walked away to cook or do something else, he threw sand on the floor. When he is not playing with it, I put the lid on the bin and store it under my bed.


3. Window Murals
We do these even if it's not raining. The window crayons by Crayola are tons of fun. You can paint on windows, mirrors, or any smooth surface with them. They come off with regular window cleaner or even wipes. I usually start by drawing some type of landscape and then give Atlas the crayons and let him paint. We have a lot of big windows in our house, so it’s almost like he gets to draw on the walls without mommy getting mad. These are the best $4 I’ve ever spent!

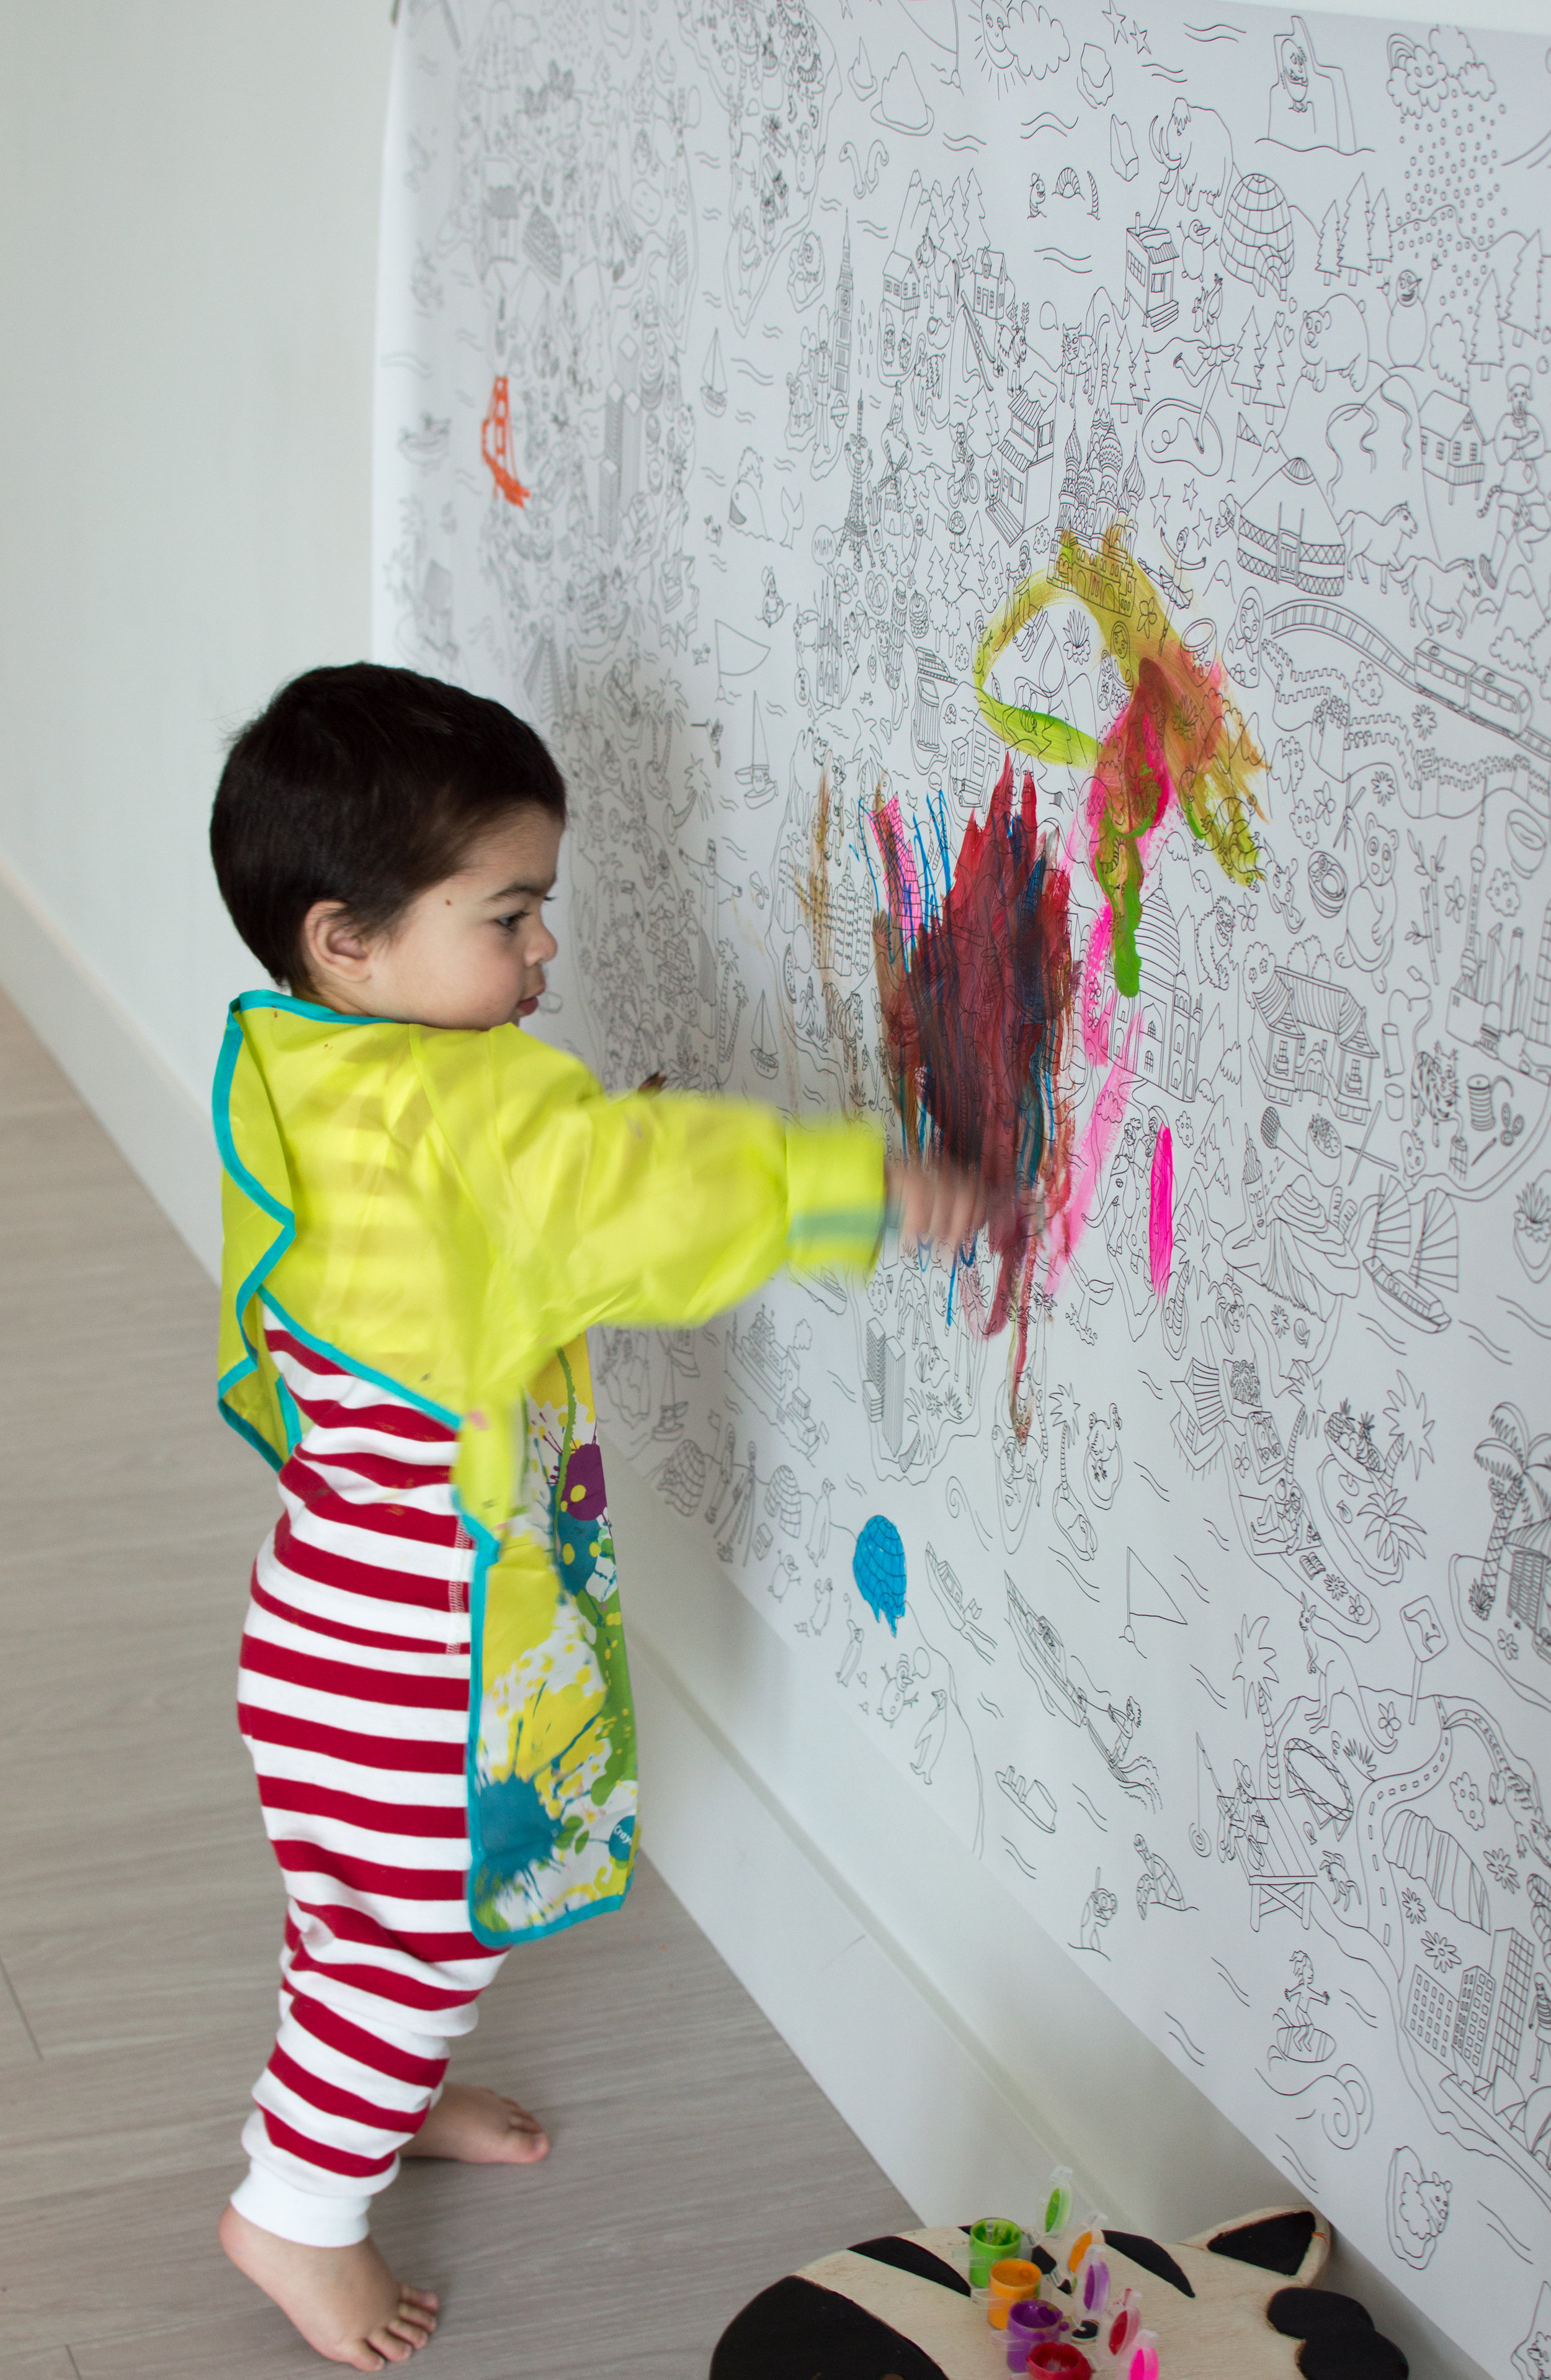

4. Mural Painting with Omy Map
We love these XXL maps from Omy! We currently have the San Francisco one in Atlas’s room as decoration, but we had two others around the house so we turned them into a "mural" painting in our living room. Atlas loves to paint, so I wanted him to have a big canvas he could paint for a long time. This worked perfectly. I used washi tape to hang the map on the wall at his level. Then I gave him a little stool and a palette of kids paint with a couple of brushes. Then I just stepped back and let him paint. He loved it! We actually kept it on the wall for several days, and he painted for a little bit each day until the map was all painted. The cleanup is easy because you just take the map down and thrown it in the recycle bin or keep it as decor. He did get paint on the wall once, but it came right off with a wet wipe. You can also put some paper on the floor in case of spills. They sell these maps in several sizes; we used the XXL.

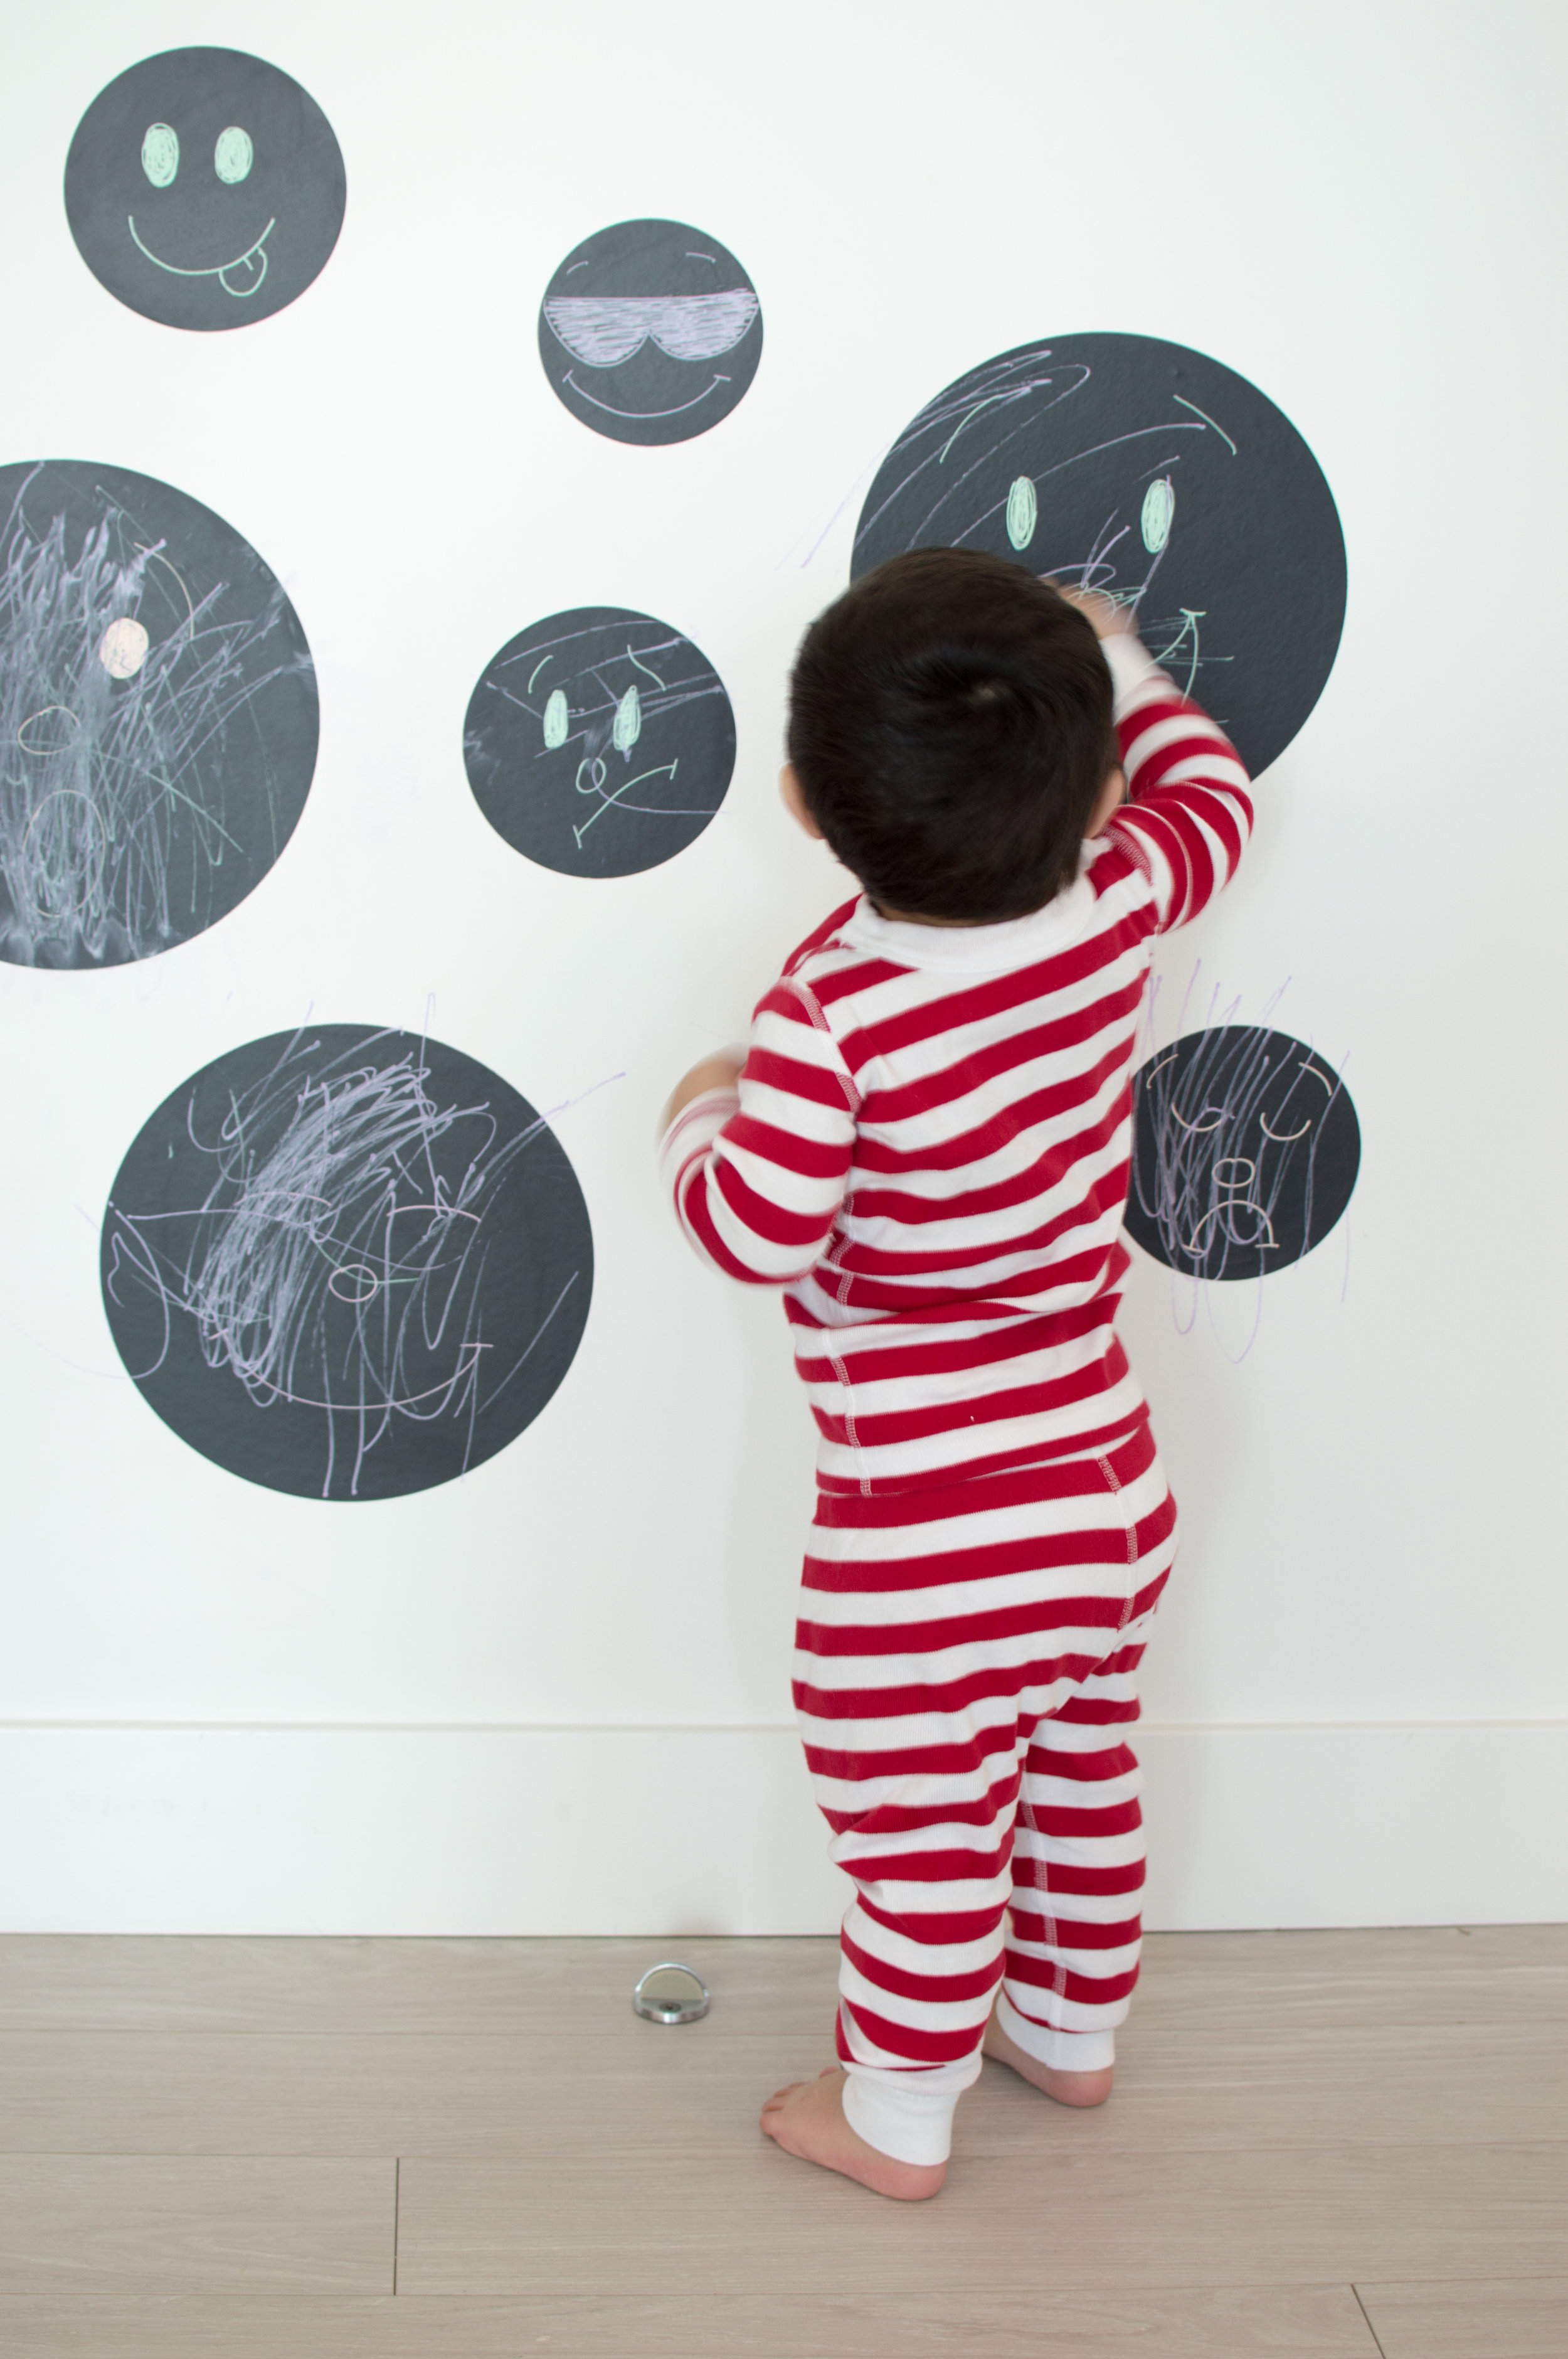

5. Making Faces with Chalkboard Dots
These are removable chalkboard circles that I usually have in Atlas’s room as decoration. Since they are removable, and he loves drawing and painting so much, I moved them to our kitchen and put some different faces on them with chalk pens. We practiced recognizing all the different emotions, and then I let him color on the faces with chalk. Regular chalk is actually harder to clean up, so I used the same chalk pens to let him color. They wipe right off.


6. Fort Building with Nugget Comfort
We have been using the Nugget as a mattress for Atlas as we transition from a crib to a regular bed. We love it because it is such a versatile object. It can be pulled out to the living room and used as a couch, or it can be used for fort building! We had a lot of fun coming up with configurations, and Atlas had the most fun tearing them all down. If you don't have a nugget, you can build forts with couch cushions, pillows, or sheets!

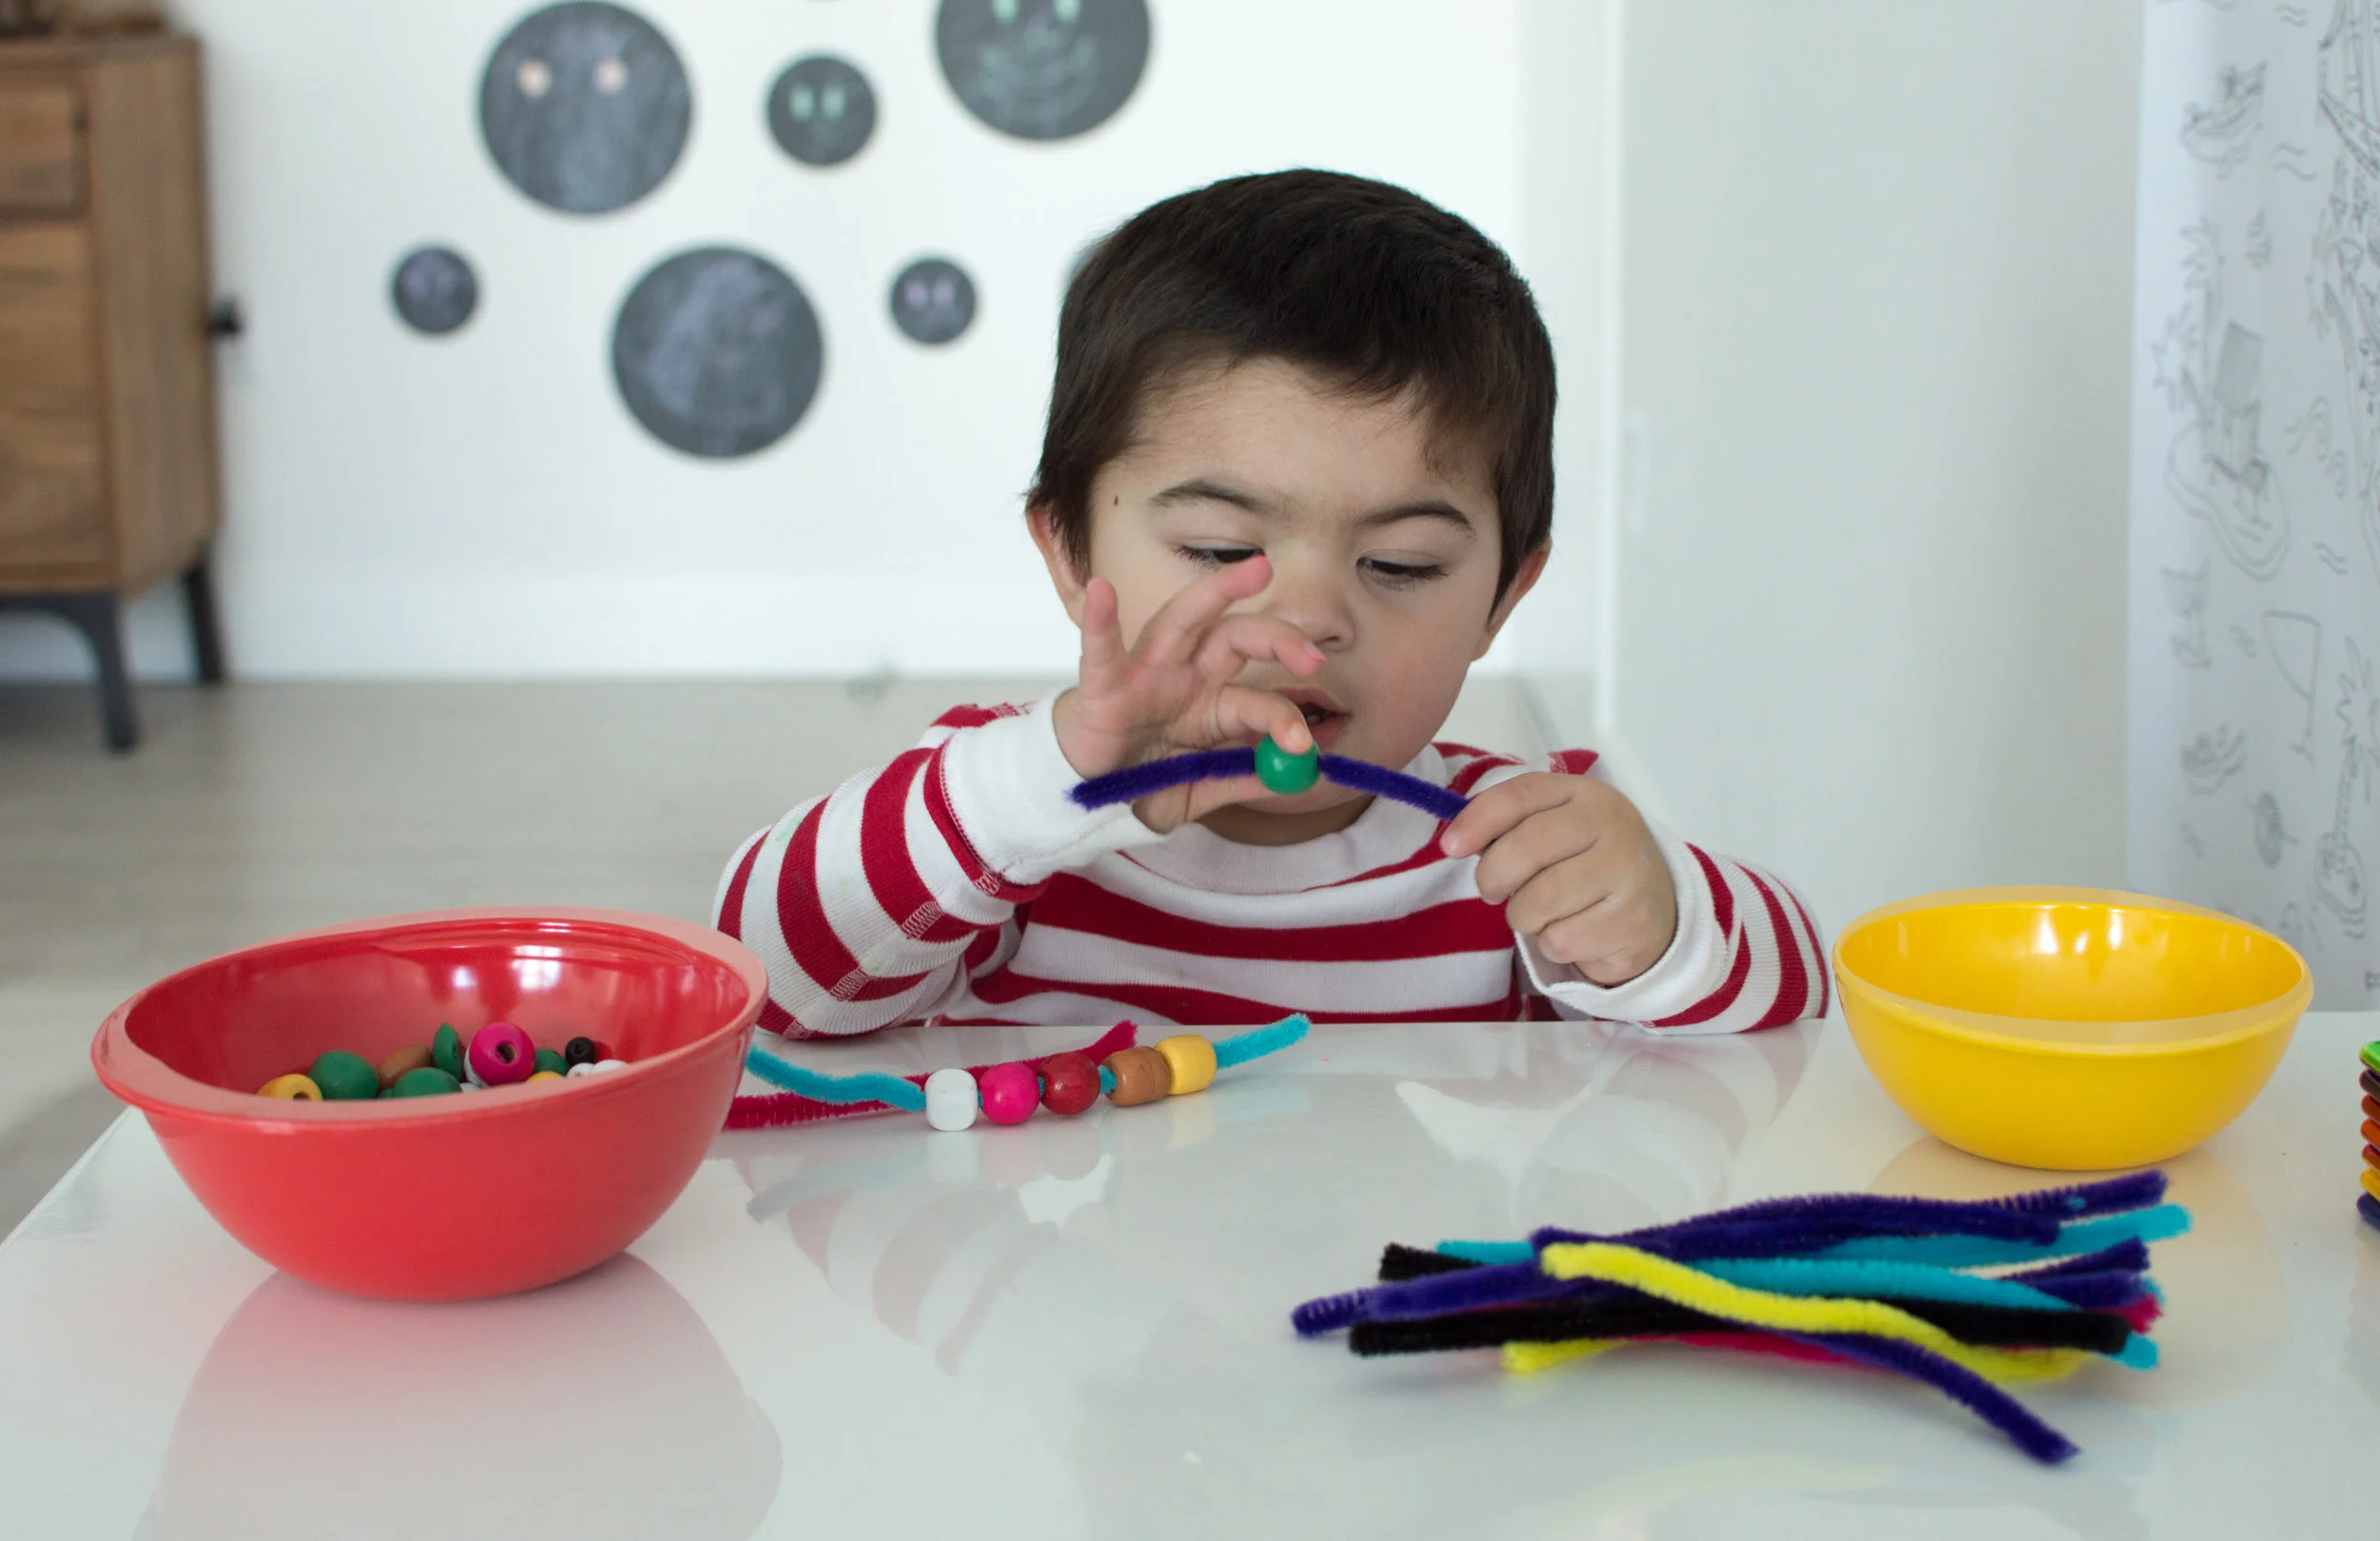
7. Bead Threading
This idea came from a messy art class we attended at the Creativity Museum. They had a station with pipe cleaners and beads that kept the kids busy for a while. All you need are chenille stems (pipe cleaners) and wood beads. I like to use the larger ones for Atlas. They sell painted ones or plain wood beads at Michaels. I cut the pipe cleaners in half and thread several beads on each one. I also give Atlas a bowl so he can put the beads in it. Eventually he will learn to thread the beads, but for now he's happy taking them off and sorting them into bowls. If you have a muffin pan, you can have your toddler place the beads in that and watch them move the beads from one crevice to the other.

All photos taken by Yvonne Liang
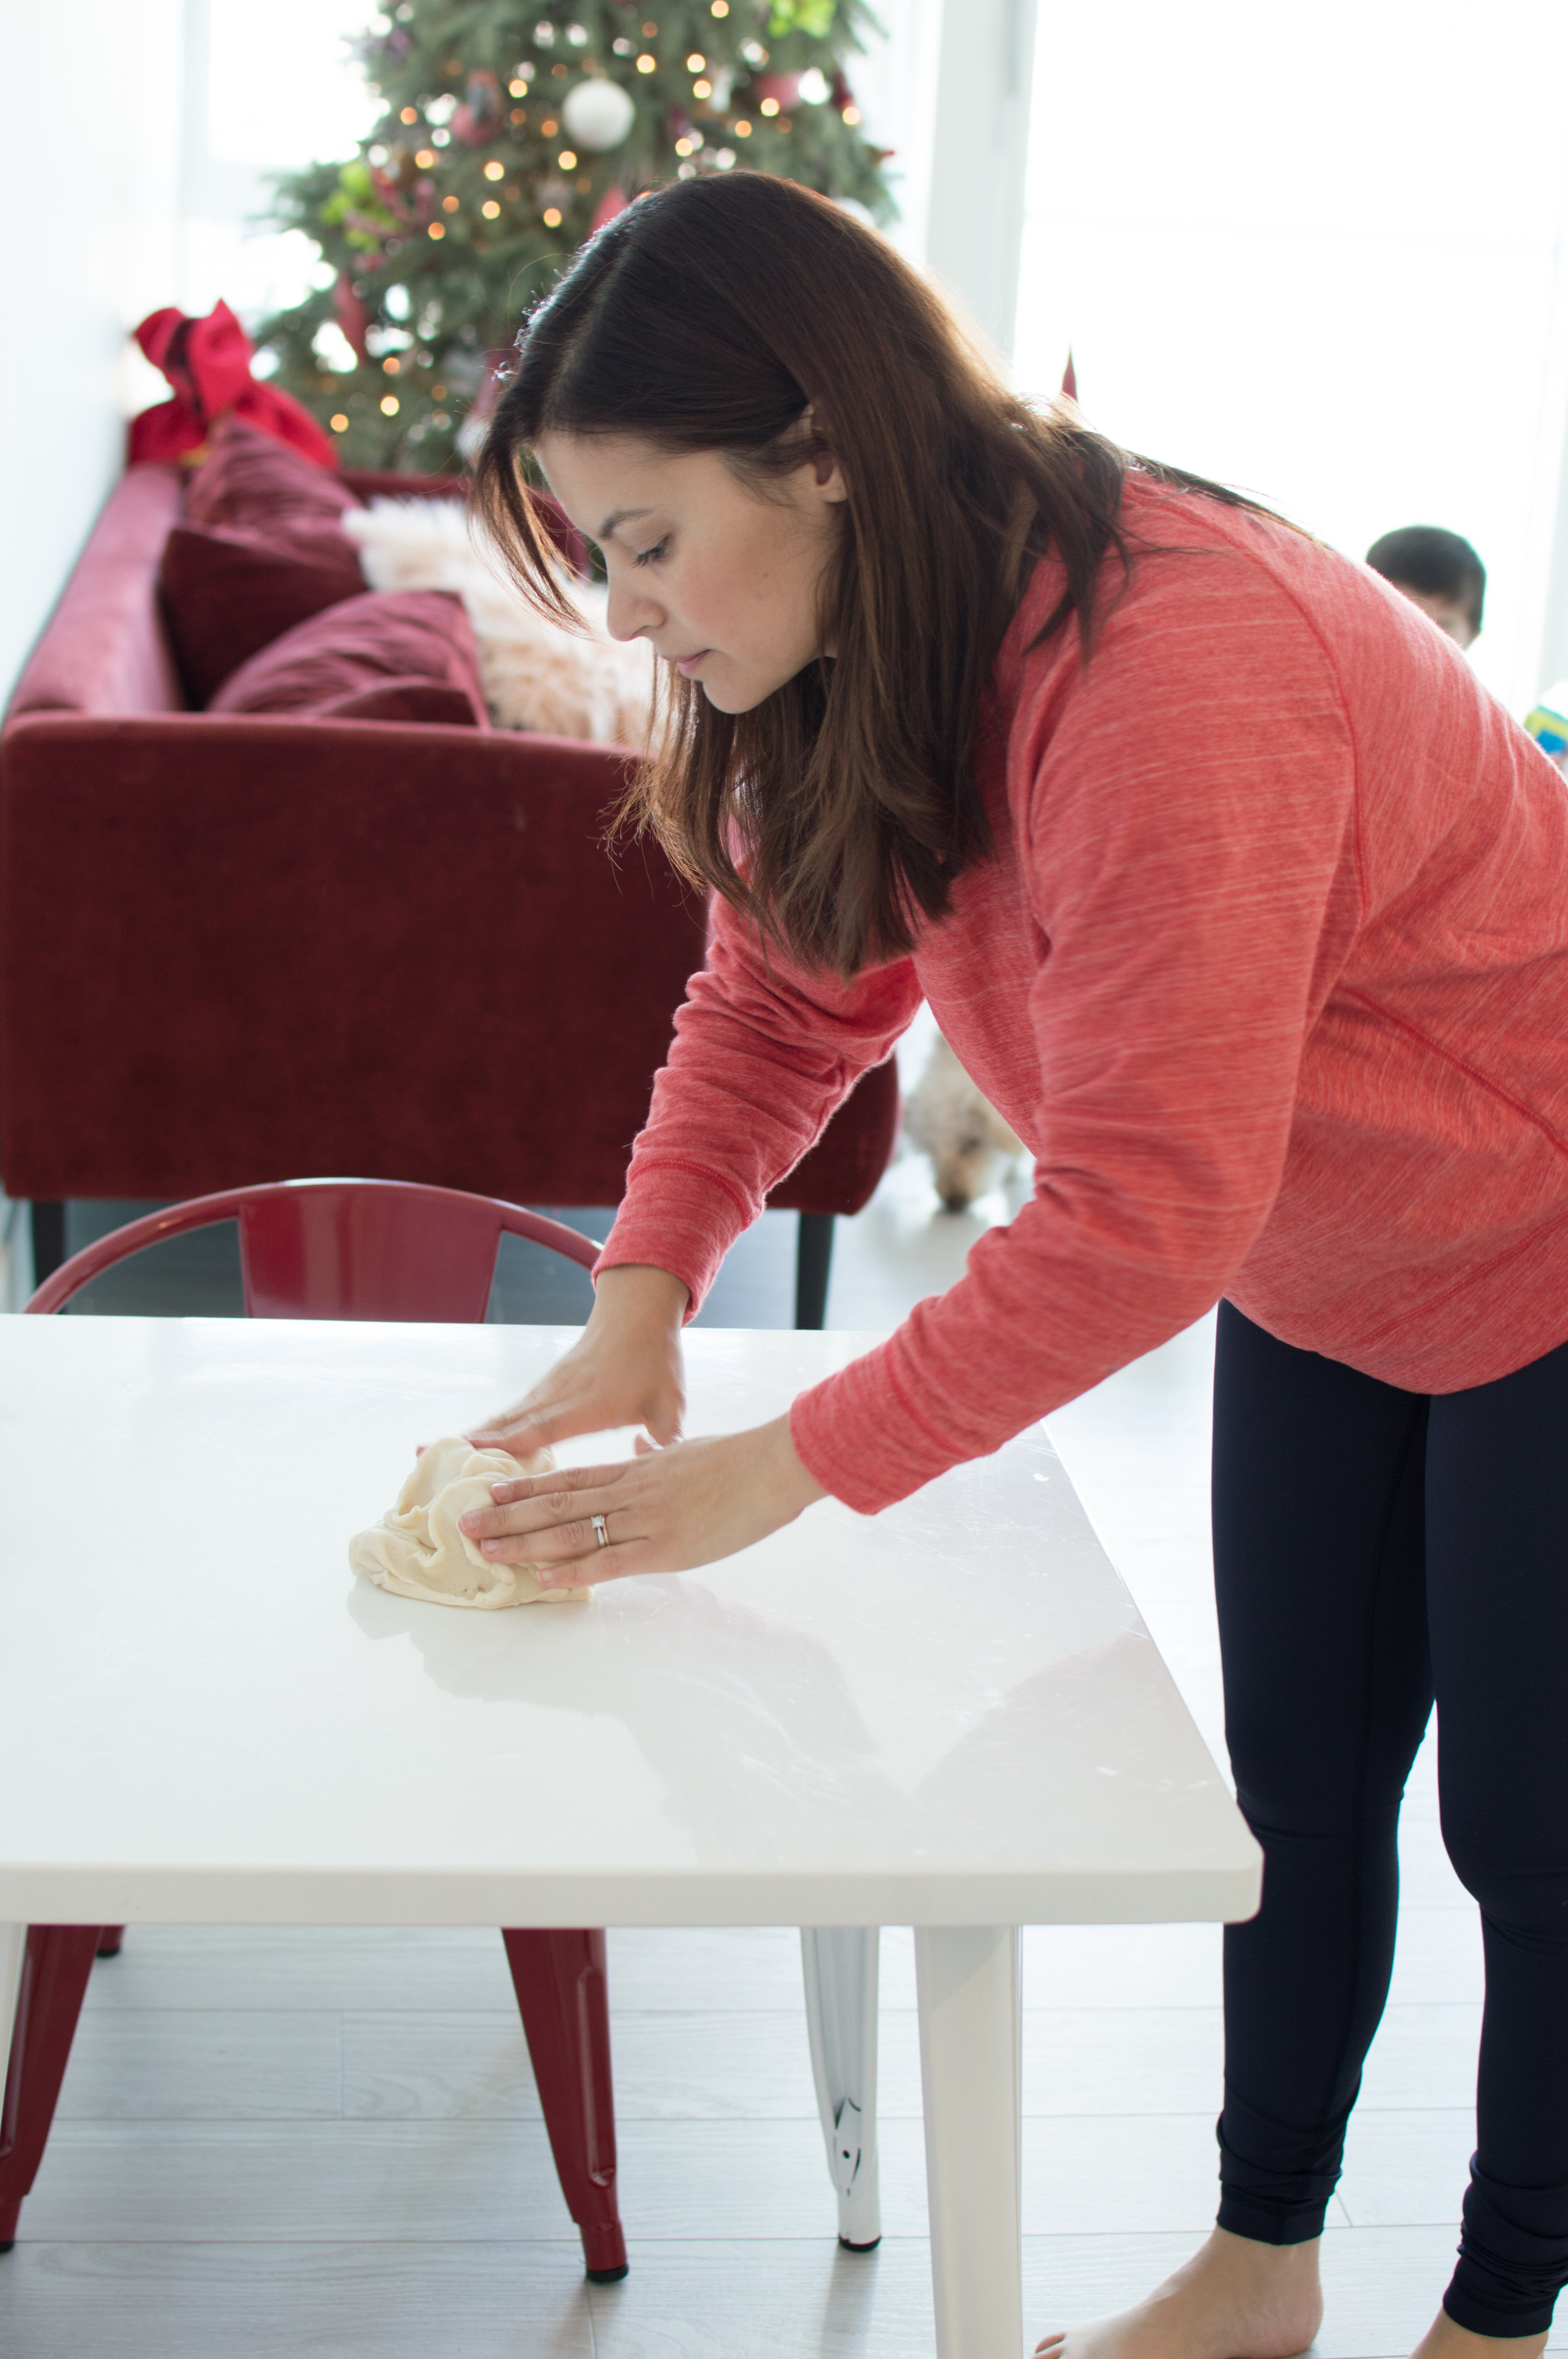
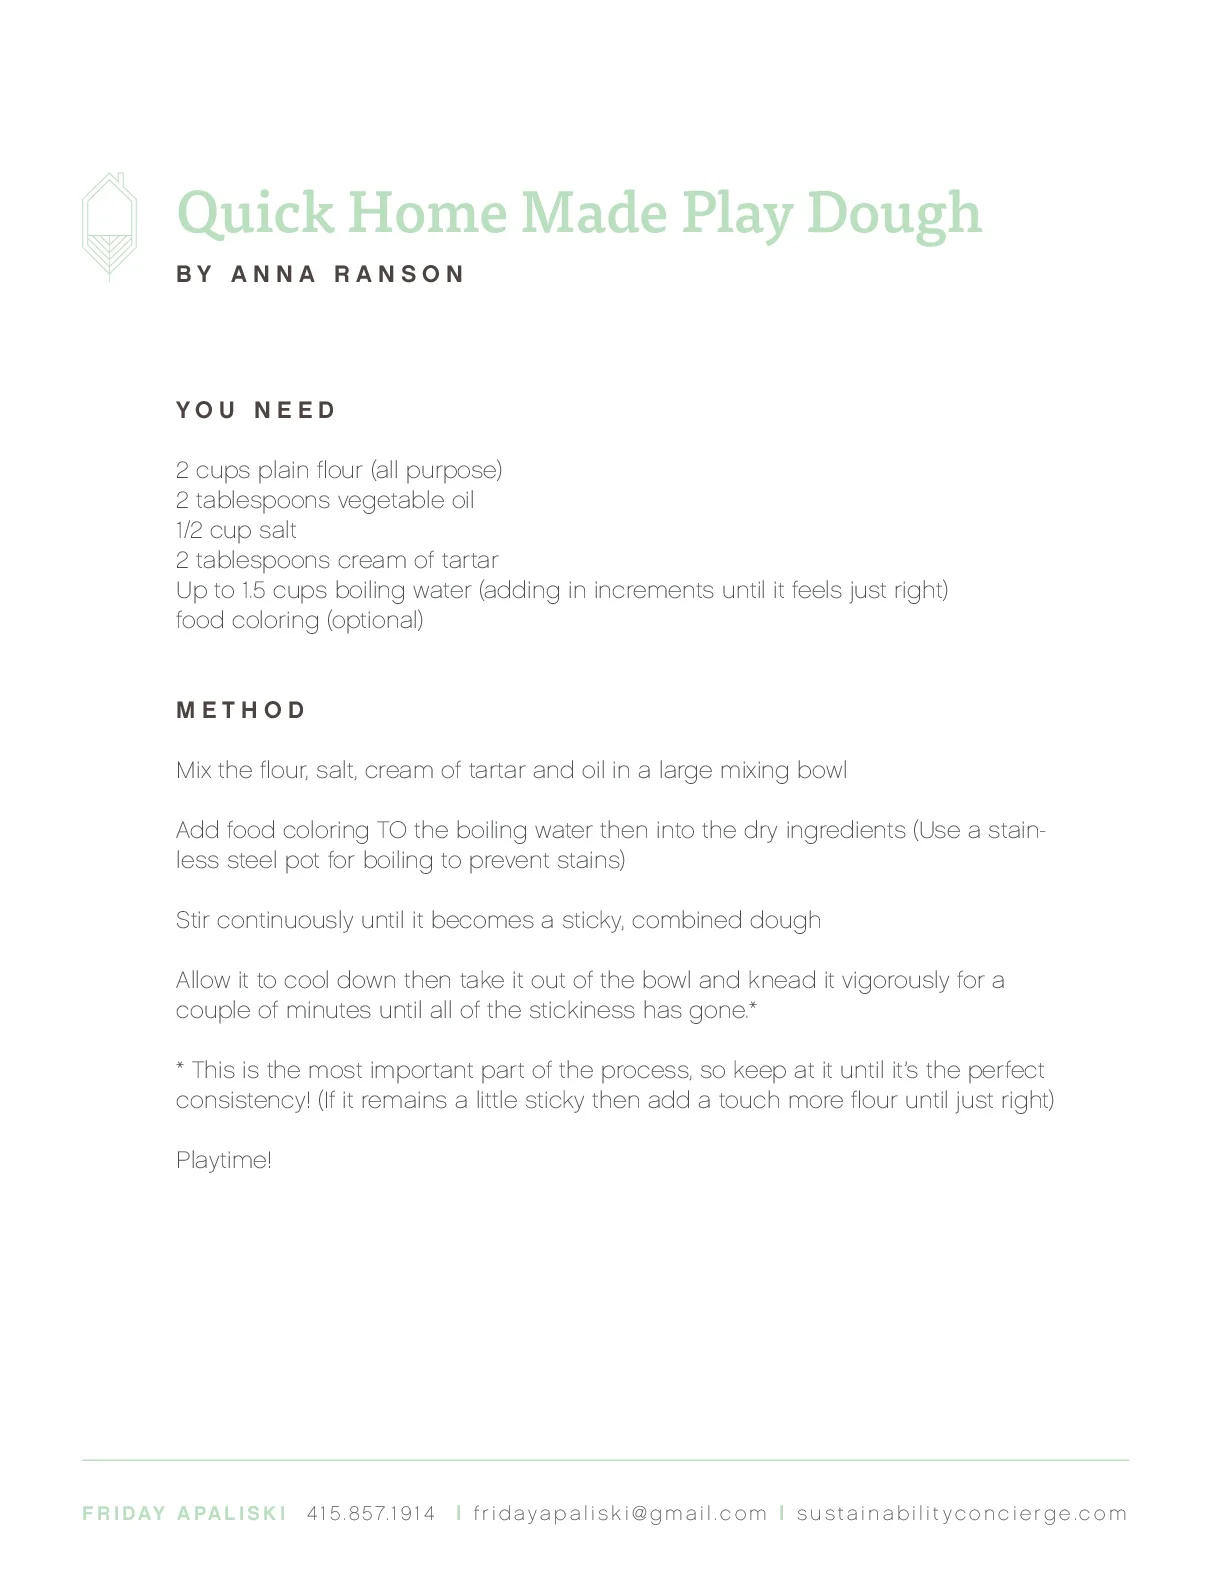
8. Making Homemade Play-Dough
This is a fun way to keep a kid occupied for a while, and it's cheaper and more green than buying regular Play-Doh. Also, I like that it makes a large batch and your kid can participate in the making of it. The recipe we used was provided by my friend who is a Sustainability Concierge, I have inserted it below. I made ours without food coloring.
I hope you find these ideas useful. Feel free to ask me any questions in comments or via email.
Have fun!
Ana

